
Introduction
Choosing the right XLR cable for studio recording affects more than basic connectivity: it influences noise rejection, signal integrity, durability, and how reliably microphones, preamps, and interfaces perform together. A cable that works on paper can still introduce hum, handling noise, or signal loss in a demanding recording environment. This article explains what to look for in conductor quality, shielding, connector construction, cable length, and studio-specific use cases, so you can match the cable to your setup instead of guessing by price alone. With those factors in mind, the rest of the guide breaks down how each specification impacts real recording results.
Why XLR Cable Choice Matters in the Studio
In professional recording environments, the analog signal path remains the most vulnerable segment of the audio production chain. Before a microphone's acoustic capture reaches the pristine domain of digital conversion, it must traverse physical wiring, where it is susceptible to degradation, interference, and high-frequency attenuation. An XLR cable is not merely a passive conduit; it is an active participant in the circuit's overall impedance and noise rejection capabilities.
Selecting the appropriate XLR cable requires moving beyond basic continuity and examining the exact electrical tolerances required by high-end studio gear. When outfitting a control room, tracking space, or vocal booth, the physical infrastructure dictates the absolute noise floor and transient response limits of the entire recording system.
Signal integrity and noise performance
The primary function of a balanced XLR cable is to transport low-voltage audio signals while rejecting external electromagnetic interference (EMI) and radio frequency interference (RFI). This is achieved through common-mode rejection, where the receiving preamplifier inverts one of the identical but out-of-phase signals, canceling out any noise picked up along the cable run.
Signal integrity becomes critical when dealing with low-output transducers. Passive ribbon microphones and vintage dynamic microphones often require 60 to 70 dB of clean preamplifier gain. At these extreme amplification levels, a cable that elevates the noise floor by even 1 to 2 dB due to poor geometry or inadequate shielding will audibly degrade the final recording, introducing hiss or low-frequency hum that cannot be easily removed in post-production.
Studio use cases and cable priorities
Different studio zones demand specific cable architectures based on their operational priorities. A live room floor requires rugged cables capable of withstanding heavy foot traffic and repeated coiling, prioritizing thick outer jackets and robust strain relief. Conversely, permanent in-wall tie lines connecting the live room to the patchbay prioritize 100 percent foil shielding and low capacitance, as they are never flexed once installed.
Furthermore, standard analog XLR cables must not be confused with cables designed for digital transmission. While they share the same 3-pin connector, AES/EBU digital audio requires a strict 110-ohm characteristic impedance to prevent data jitter and signal reflection. Using a standard 45-ohm analog microphone cable for an AES/EBU digital run will often result in dropouts and synchronization errors over distances exceeding 15 meters.
How XLR Cable Construction Affects Performance

The empirical performance of an audio cable is dictated entirely by its physical geometry and material science. Understanding the internal anatomy of an XLR cable allows audio engineers to correlate manufacturer specifications with real-world acoustic results, moving past marketing terminology to objective electrical behavior.
Balanced design basics
At the core of the balanced audio standard is the twisted pair geometry. By twisting the hot and cold signal conductors around each other at a consistent pitch, the cable ensures that any external magnetic field induces an identical voltage in both wires, which is subsequently canceled at the differential input stage.
The tightness of this twist, known as the lay length, directly impacts the cable's noise rejection. Professional-grade studio cables typically feature a lay length between 0.5 and 1.5 inches. A shorter, tighter lay length improves common-mode rejection but requires more copper per foot, increasing both the cost and the overall capacitance of the cable.
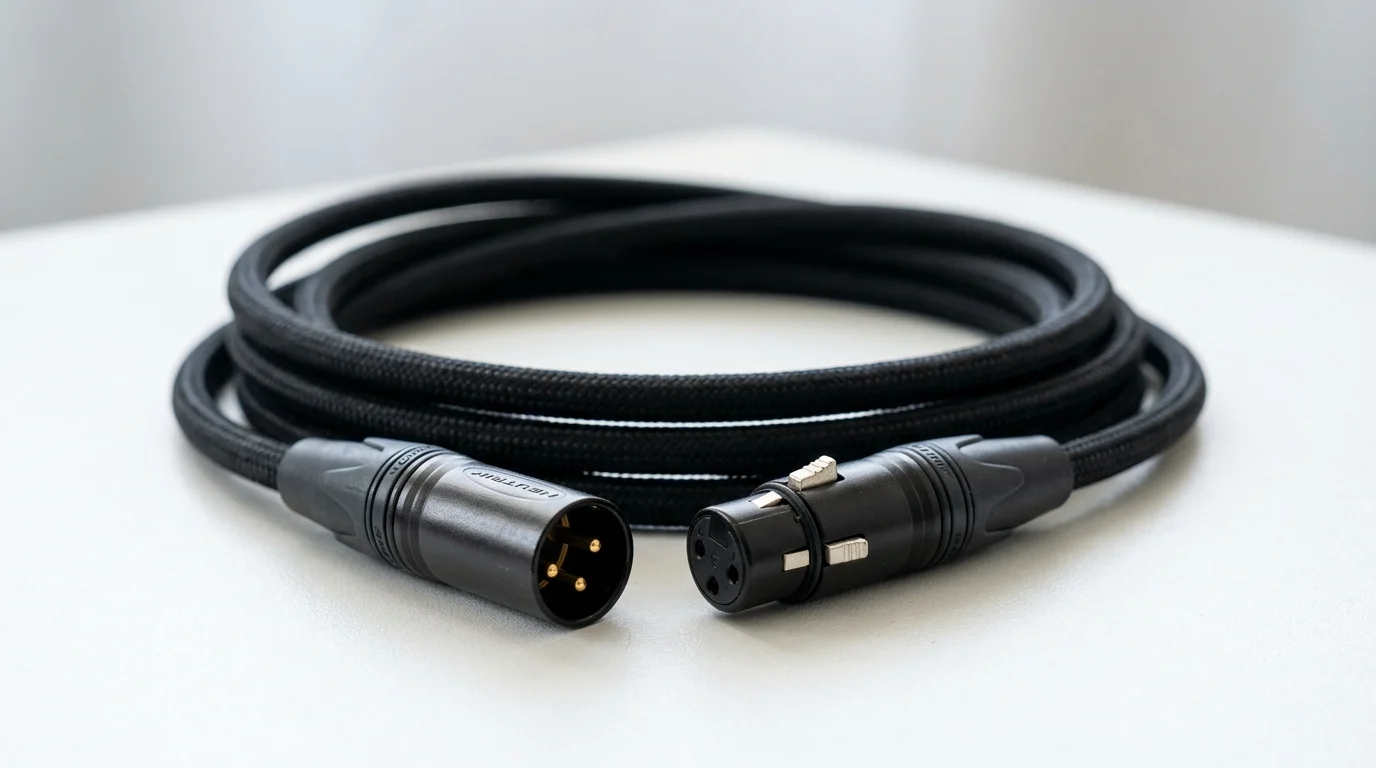
Shielding, connectors, and strain relief
Shielding serves as the primary defense against electrostatic noise. The type of shielding chosen dictates a cable's flexibility, durability, and coverage percentage. Connectors are equally critical; industry-standard components from manufacturers like Neutrik or Switchcraft feature machined contacts and robust chuck-type strain relief, preventing the internal solder joints from bearing physical loads.
Contact plating also plays a vital role in long-term reliability. Gold plating (typically 0.2 µm thickness) is highly resistant to oxidation, making it ideal for permanent patchbay connections that are rarely unplugged. Silver plating offers slightly better immediate conductivity but tarnishes over time, requiring regular cleaning in high-use environments.
| Shielding Type | Typical Coverage | Flexibility | Best Studio Application |
|---|---|---|---|
| Braided Copper | 80% – 95% | Moderate | High-traffic live rooms, stage mics |
| Spiral (Serve) | 90% – 95% | High | Patch cables, short flexible runs |
| Foil (Aluminum) | 100% | Low | Permanent installation, in-wall wiring |
Key specs for comparing microphone cables
When evaluating microphone cables, capacitance is arguably the most critical electrical specification. Measured in picofarads per foot (pF/ft) or per meter (pF/m), capacitance acts as a low-pass filter, rolling off high frequencies. The higher the capacitance and the longer the cable, the lower the cutoff frequency becomes.
For pristine studio recordings, engineers look for cables with a core-to-core capacitance of less than 30 pF/ft (approximately 98 pF/m). While a high-capacitance cable might go unnoticed on a bass guitar DI, using a 60 pF/ft cable on a 100-foot run for a high-end condenser microphone will result in a measurable loss of top-end "air" and transient detail.
How to Compare XLR Cable Options
Procuring studio cabling requires separating empirical engineering benefits from audiophile marketing claims. By comparing structural designs, bulk material costs, and environmental interference factors, studio managers can allocate their infrastructure budgets efficiently without sacrificing audio fidelity.
When premium cables are worth it
The law of diminishing returns applies heavily to analog audio cables. While upgrading from generic, unshielded wire to a professional twisted-pair cable yields massive improvements in noise floor and frequency response, spending exponentially more on "exotic" materials often yields unmeasurable results.
Premium cables frequently advertise 99.999% Oxygen-Free Copper (OFC). While OFC is standard in professional audio due to its resistance to internal oxidation and corrosion over decades of use, it does not inherently sound better than standard 99.9% pure copper. The true value of premium cables lies in their tight manufacturing tolerances, consistent capacitance from batch to batch, and superior mechanical durability, rather than mystical acoustic properties.
Length, routing, and interference factors
As cable runs increase in length, capacitive reactance and interference susceptibility become significant factors. For short runs under 15 feet (5 meters), standard twisted-pair cables with spiral shielding are generally sufficient. However, for runs exceeding 50 feet (15 meters)—common in large multi-room facilities—more advanced geometries are required.
In environments with severe electromagnetic interference, such as studios located near radio transmitters or heavy industrial power lines, Star-Quad cable is the preferred solution. By utilizing four conductors instead of two, Star-Quad geometry reduces electromagnetically induced noise by up to 15 to 20 dB compared to standard twisted pair. The trade-off is a roughly 30 to 50 percent increase in capacitance, making it crucial to balance noise rejection against high-frequency retention based on the total cable length.
Custom, OEM, and branded cable trade-offs
Facility managers must weigh the cost of pre-assembled retail cables against purchasing bulk wire and raw connectors. Pre-assembled cables offer immediate plug-and-play convenience and manufacturer warranties, but they carry a high retail markup, often costing $40 to $80 for a standard 15-foot length.
Conversely, standardizing on an OEM bulk cable (such as specific lines from Mogami, Canare, or Belden) costs between $0.80 and $1.50 per foot. When combined with $3 to $5 raw connectors, an in-house technician can assemble custom-length cables that perfectly match the studio's physical dimensions. This custom approach eliminates excess coiled slack behind racks, which can act as inductors and attract unwanted RF noise.
How to Choose the Best XLR Cable for Your Studio
Selecting the optimal infrastructure wiring involves a systematic evaluation of the facility's physical and electrical environment. A highly specified cable in the wrong application will underperform, making environmental assessment the most critical step in the procurement process.
Assessing interfaces, run length, and environment
Mapping the physical routing of analog lines is the first step in cable selection. Audio cables should never run parallel to AC power lines. If they must cross, they should do so at a strict 90-degree angle. When routing cables through ceilings or sub-floors, analog paths must maintain a minimum 12-inch separation from high-voltage AC conduits and lighting ballasts to prevent 60 Hz (or 50 Hz) mains hum induction.
The output impedance of the source device must also be considered. Modern active synthesizers and preamplifiers output at very low impedances (often under 100 ohms), making them highly resilient to cable capacitance. Passive instruments and dynamic microphones require much stricter capacitance management to preserve their frequency response.
Inspection, testing, and procurement checks
Prior to installation, rigorous quality control must be applied to all newly acquired or assembled XLR cables. A dedicated cable tester should be used to verify pin continuity (Pin 1 to Ground, Pin 2 to Hot, Pin 3 to Cold) and to ensure there are no short circuits between the conductors or the shield.
Professional facilities also test for contact resistance. A high-quality solder joint and clean connector should present less than 0.1 ohms of resistance per contact. Additionally, engineers must decide how to handle the connector shell ground; tying Pin 1 to the connector chassis can sometimes create ground loops when cables touch metal hardware, so many studios prefer to leave the connector shell floating.
A simple decision framework
To streamline procurement, studio engineers utilize standardized criteria based on the specific application. By categorizing needs into tracking, patching, and digital transmission, the selection process becomes a straightforward matching exercise.
| Studio Application | Recommended Geometry | Target Capacitance | Max Recommended Length |
|---|---|---|---|
| Critical Vocal Mics | Star-Quad | < 50 pF/ft | 100 ft (30m) |
| Line-Level Patching | Twisted Pair | < 30 pF/ft | 50 ft (15m) |
| Digital Audio (AES3) | 110-Ohm Twisted Pair | Spec Dependent | 300 ft (100m) |
| In-Wall Tie Lines | Foil Shielded Pair | < 30 pF/ft | 150 ft (45m) |
What Makes a Sound XLR Cable Buying Strategy
A comprehensive cabling strategy treats analog wiring as a permanent infrastructure investment rather than a disposable accessory. The goal is to create a transparent, reliable signal path that requires zero troubleshooting during critical production hours.
Balancing performance, durability, and serviceability
The true cost of a cable includes its failure rate and serviceability. A cheap molded cable that fails during a $150-per-hour recording session instantly costs more in studio downtime than the premium paid for a high-quality, serviceable alternative. Connectors with internal chuck-type strain relief are essential, as they can withstand over 100 lbs of pull force without transferring tension to the delicate internal solder joints.
Serviceability means that when a cable is crushed by a heavy road case or a door, the damaged section can be cut off and the connector re-soldered. Cables with molded plastic ends cannot be repaired and must be discarded entirely, making them a poor long-term investment for professional facilities.
Final criteria for professional studio cables
Ultimately, standardizing on a limited number of high-quality cable stocks yields the best operational consistency. By wiring an entire facility with a specific twisted-pair cable for line-level runs (e.g., maintaining a baseline of 23 pF/ft) and a specific Star-Quad cable for microphone runs (e.g., 46 pF/ft), the studio's overall capacitive load becomes a known, predictable variable.
This standardized approach simplifies troubleshooting, ensures uniform sound quality across all recording channels, and allows the engineering staff to focus entirely on acoustic capture and artistic performance, confident that the analog infrastructure is operating at peak empirical efficiency.
Key Takeaways
- The most important conclusions and rationale for XLR Cable
- Specs, compliance, and risk checks worth validating before you commit
- Practical next steps and caveats readers can apply immediately
Frequently Asked Questions
What matters most when choosing an XLR cable for studio recording?
Prioritize balanced twisted-pair construction, effective shielding, low capacitance, and durable connectors. For critical vocal or instrument tracks, choose low-noise OFC copper cable with solid strain relief.
Which shield type is best for a studio XLR cable?
Use braided copper for rugged live-room runs and frequent handling. Use foil shielding for permanent in-wall or patchbay lines where maximum coverage matters more than flexibility.
Can I use a regular analog XLR cable for AES/EBU digital audio?
No. AES/EBU needs a 110-ohm XLR cable. Standard analog mic cables can cause reflections, jitter, or dropouts, especially on longer runs.
How long can an XLR cable run be before noise becomes a problem?
For most studios, keep microphone runs as short as practical. Quality balanced cables handle long runs well, but low-output mics benefit most from shorter, well-shielded cables.
Does JINGYI Audio offer custom XLR cables for studios or OEM projects?
Yes. JINGYI provides premade and OEM/ODM XLR cable solutions, including private label options, custom lengths, connector choices, and studio or system-integration support.


