
A reliable microphone stand is the cornerstone of any compelling performance. It provides the necessary foundation for consistent audio delivery and performer comfort. Performers can truly focus on their craft. Choosing a sturdy microphone stand directly impacts their ability to engage an audience without distraction, ensuring optimal sound quality and performance. This essential tool allows artists to shine on stage.
Key Takeaways
- A stable microphone stand helps your sound. It keeps the microphone still. This makes your performance better.
- Different microphone stands work for different needs. Tripod stands are good for travel. Round base stands are good for staying in one spot. Boom stands reach over instruments.
- Good microphone stands use strong materials. They have easy height adjustments. They also have stable bases. These features make them last longer.
- Always check your microphone stand. Make sure it is not overloaded. Keep cables tidy. Do regular cleaning. This helps your stand work well and stay safe.
Why a Stable Microphone Stand is Crucial for Performers
A stable microphone stand is more than just an accessory; it is a fundamental piece of equipment for any performer. It directly influences the quality of their sound, their physical comfort, and their overall stage presence. Performers rely on this essential tool to deliver their best work without interruption.
The Foundation of Flawless Audio with Your Microphone Stand
A wobbly or unstable stand can quickly turn a great performance into a frustrating experience. It introduces unwanted noise, like creaks or thuds, into the microphone. This compromises the audio quality. A stable support ensures the microphone stays exactly where the performer places it. This consistent positioning captures their voice or instrument perfectly every time. It allows sound engineers to achieve optimal sound mixing without constant adjustments.
Ergonomics and Comfort for Peak Performance with a Microphone Stand
Performers spend hours practicing and performing. A properly adjusted stand prevents unnecessary strain and fatigue. They can set the microphone at the ideal height and angle for their posture. This ergonomic setup reduces discomfort in their neck, back, and shoulders. When performers feel comfortable, they can fully immerse themselves in their music or speech. This focus leads to a more engaging and powerful performance for the audience.
Projecting Confidence Through Microphone Stand Stability
A performer’s stage presence is vital. A sturdy microphone stand contributes significantly to this. It conveys professionalism and reliability to the audience. Performers feel secure knowing their equipment will not fail them. This security allows them to move freely and express themselves confidently. They do not need to worry about a tilting mic or a collapsing support. This unwavering stability helps them project an aura of control and mastery over their craft.
Understanding Types of Microphone Stands for Your Needs

Choosing the right microphone stand makes a big difference for any performer. Different situations call for different types of stands. Knowing the options helps you pick the best one for your specific needs. Let’s explore the most common types you will encounter.
Tripod Microphone Stands for Versatility
Tripod microphone stands are a popular choice because they offer great versatility. They feature three foldable legs that spread out to create a stable base. This design makes them easy to pack up and carry, which is perfect for musicians on the go. While their extended feet can sometimes be a trip hazard, their portability often outweighs this small concern.
These stands are quite sturdy. For example, some models weigh around 5 pounds, with tripod legs that spread about 20.5 inches wide for excellent balance. Their height can often adjust significantly, from about 34 to 62 inches, making them suitable for various performers. Many are made from strong materials like steel and polymer, ensuring durability. Heavy-duty tripod stands often have bases weighing between 8 to 15 pounds to prevent tipping, even with heavier microphones. Wider leg spans also boost stability, though they do take up more floor space. Non-slip rubber feet are a must-have feature; they stop the stand from sliding on smooth surfaces. For general use, a height range of 40 to 75 inches or more is common. Always check that the stand remains stable when fully extended. Steel tubing is usually preferred for its strength, and machined metal joints are better than plastic for handling heavier loads.
Round Base Microphone Stands for Stationary Performers
Round base microphone stands are a classic choice, especially for performers who stay in one spot. These stands feature a heavy, circular base that provides exceptional stability. This design gives them a low center of gravity, making them very resistant to accidental bumps or knocks. This stability is crucial for maintaining consistent audio quality during a performance.
Performers often appreciate their durable construction, which ensures they last a long time. While they are heavier and less portable than tripod stands, their unwavering stability makes them ideal for studio work, fixed stage setups, or vocalists who do not move much. You can easily adjust their height to position the microphone perfectly, whether you are standing or sitting. This makes them a reliable investment for any stationary performer.
Boom Microphone Stands for Extended Reach and Instrument Miking
Boom microphone stands are incredibly useful when you need to position a microphone precisely, especially for instruments or in tight spaces. These stands feature an extendable arm, called a boom arm, that attaches to the top of a straight stand. This arm allows you to move the microphone horizontally, giving you much more flexibility than a standard straight stand.
Musicians like guitar players find boom stands invaluable. They can position the microphone over their instrument without the stand getting in the way. Drummers also use them to mic different parts of their kit. Boom arms come in both fixed and adjustable lengths, offering various reach options. For instance, some boom arms offer a horizontal reach of 20 to 30 inches, while others can extend up to 40 inches. They can typically support microphones weighing between 4.4 lbs and 7 lbs, depending on the model. Internal spring-balanced booms are a great feature; they reduce strain on the main column and make adjustments smoother. A flexible gooseneck tube can also attach to a stand, allowing for tiny, precise adjustments to the microphone’s position.
Desktop Microphone Stands for Podcasts and Streaming
Podcasters, streamers, and voice-over artists often work from a desk. For them, a desktop microphone stand is an absolute must-have. These stands keep the microphone stable and positioned perfectly on a flat surface. They ensure clear audio capture without taking up too much space. Choosing the right one makes a big difference for your sound quality and overall setup.
When you look for a desktop stand, consider several key features:
- Weight Capacity: The stand must easily support your microphone’s weight. Heavier microphones, like the Electro-Voice RE20 or Shure SM7B, need sturdier arms to prevent sagging.
- Adjustability: Look for stands with multiple pivot points and lockable joints. These allow for smooth, tool-free adjustments, so you can quickly find the perfect mic position.
- Base Type: You have options here. Weighted bases prevent tipping but take up desk space. Clamps save room and attach to the desk edge, typically fitting desks 2–5 cm thick.
- Thread Standard: Most stands use 5/8"-27 male threads. Make sure your microphone matches, or get an adapter if needed.
- Vibration Isolation: Features like rubberized feet or internal dampeners are crucial. They reduce desk-borne vibrations, which can otherwise muddy your audio.
- Cable Management: Built-in channels help route your XLR or USB cables neatly. This reduces clutter, prevents hazards, and minimizes electromagnetic interference.
- Build Quality: Metal components, like steel or aluminum, are always better than plastic, especially for joints. They offer greater durability and stability.
- Mounting Options: Decide between weighted bases, which are safer on carpet, or clamp mounts, which work better for hard desks.
Also, watch out for red flags. Avoid stands with plastic joints if they claim a high weight capacity. Missing rubber feet, non-standard threading without adapters, and overly loose pivot points are also signs of a low-quality product. A good desktop stand ensures your voice comes through crystal clear, making your content sound professional.
Specialty Microphone Stands for Unique Applications
Sometimes, a standard stand just will not cut it. Certain performance or recording situations demand a specialty microphone stand designed for unique applications. These stands solve specific problems and help capture sound in challenging environments.
For instance, you might need a low-profile stand for miking a kick drum or a guitar amplifier. These stands sit very close to the ground, allowing precise placement without getting in the way. Overhead stands, on the other hand, extend high above the performers. They are perfect for capturing the sound of a choir or as overheads for a drum kit, providing a wide, ambient sound.
You can also find multi-microphone stands. These are great for interviews or specific instrument setups where you need to mic several sources from one central point. Some stands even come with integrated pop filters or shock mounts, streamlining your setup and improving audio quality right out of the box. There are also stands designed to clamp directly onto instruments, like drum rims, offering a secure and isolated mic position. These specialized tools ensure every sound source gets the attention it deserves.
Key Features to Look For in a Quality Microphone Stand
Choosing a quality microphone stand means looking closely at its design and construction. A good stand supports your microphone reliably. It also makes your performance easier and more professional. You want a stand that lasts and performs well every time.
Material and Durability of Your Microphone Stand
The materials used in a microphone stand determine its strength and lifespan. You want a stand that can handle regular use and transport. High-quality stands often use strong metals. For example, heavy-duty steel offers great durability. It makes the stand reliable and very stable. This is important for professional use. Some manufacturers also use cold-rolled steel or hardened aluminum alloys. These materials resist bending and provide excellent durability. They ensure the stand maintains its shape and function over time. Avoid stands with too many plastic parts, especially in critical areas like joints or bases. Metal components offer superior strength and stability.
Height Adjustment and Locking Mechanisms on a Microphone Stand
A good microphone stand allows easy and secure height adjustments. Performers need to set the microphone at the perfect level for their comfort and sound. Look for smooth adjustment mechanisms. They should move without sticking or wobbling. The locking mechanism is also very important. It must hold the stand firmly in place once you set the height. Common types include twist clutches, cam locks, or friction locks. A reliable lock prevents the stand from slipping down during a performance. Some advanced stands even offer one-handed height adjustment. This feature allows quick changes on stage without interrupting your flow.
Base Stability: Weight, Footprint, and Anti-Tip Design of a Microphone Stand
The base provides the foundation for the entire stand. Its stability is crucial. A heavy base helps prevent tipping. Weighted bases are excellent for this purpose. They keep the stand firmly planted, even if someone bumps it. The base’s footprint, or how much floor space it covers, also affects stability. A wider footprint generally means more stability, especially for tripod stands. However, a wider footprint also takes up more space. Anti-tip designs are also important. For round bases, a low center of gravity makes them very stable. For tripod stands, widely spread legs prevent tipping. Many quality stands also feature rubber feet. These feet prevent the stand from sliding on smooth surfaces. They also help reduce vibrations that could travel up to the microphone.
Portability and Storage of Your Microphone Stand
Performers often travel, so a microphone stand needs to be easy to move and store. A portable design saves time and effort. It also makes packing and unpacking much simpler. When you choose a stand for frequent travel, consider its weight. Aim for models weighing under 3 lbs (1.4 kg). This keeps your gear light.
You also need to check the folded dimensions. Make sure they fit within your luggage limits. For example, a model like the ESM-52 Elite weighs 4 lbs. It folds down to a compact 3.75” x 3” x 34”. This size makes it easy to carry and store. Many stands feature collapsible legs and a removable boom arm. This design allows them to fold into a smaller package. Some even have stackable bases. These bases let you store multiple stands efficiently in a small space. Look for stands with carrying bags or cases. They protect your equipment during transport. They also make it easier to handle.
Cable Management Solutions for Your Microphone Stand
A messy stage looks unprofessional. It also creates trip hazards. Good cable management keeps your setup clean and safe. Many modern microphone stands offer smart solutions for cables. These features help you maintain a clutter-free workspace.
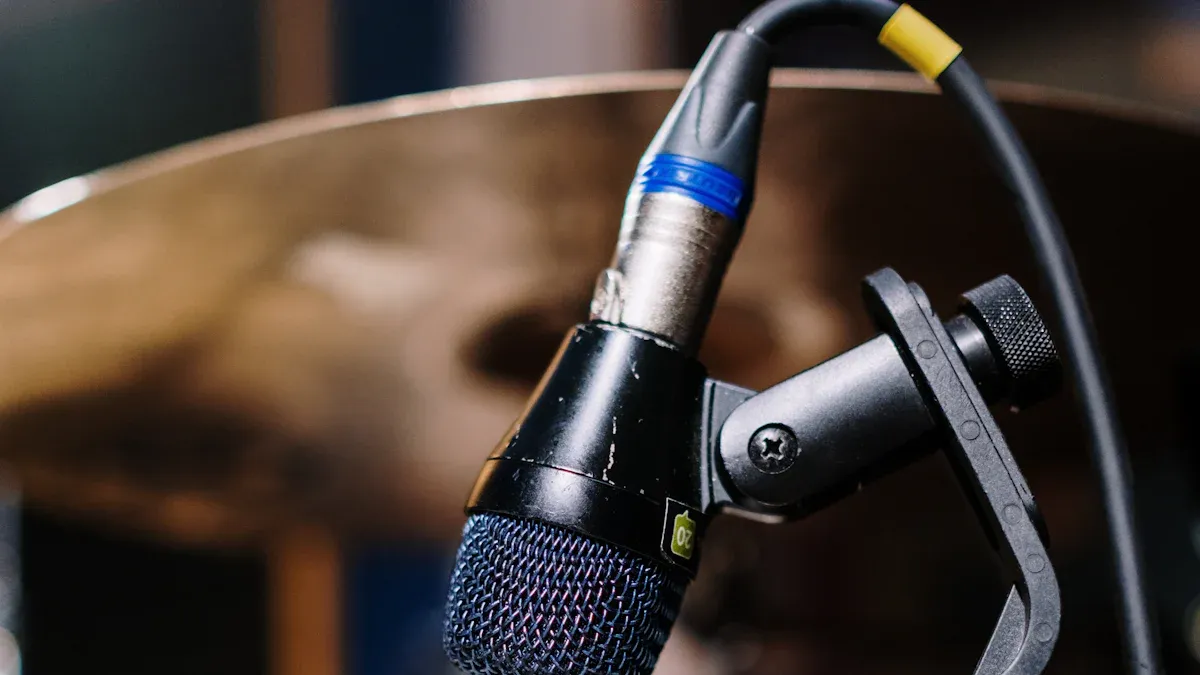
Some boom arm models, like the Lizard, Valiant, and Captain, include hidden cable management. This design keeps cables neatly tucked away. It creates a clean and organized look. Other stands offer integrated cable management for both USB and XLR cables. This ensures a tidy setup, whether you use a condenser mic or a dynamic one. These solutions are often compatible with microphones weighing from 94g to 1.2kg. They keep your cables secure and out of sight. This prevents tangles and reduces the risk of accidental disconnections. It also makes your stage or studio look much more professional.
Compatibility and Accessory Options for Your Microphone Stand
A microphone stand is just the beginning. Its true versatility comes from its compatibility with various accessories. These additions enhance functionality and adapt the stand to many different needs.
First, consider thread sizes. In the US, most microphone stands feature a 5/8" threaded male end. This fits standard mic mounts. However, European countries commonly use a 3/8" thread. You might need a threaded bushing or adapter. This adapter has a 5/8" side and a 3/8" side. It ensures compatibility between your stand and microphone.
Beyond basic compatibility, many accessories can improve your setup:
- Microphone Holders: You can find hard rubber holders for standard and wireless mics. Soft rubber clips fit most dynamic/vocal microphones. Both use a 5/8” thread. Shock-mount holders are also available. They protect microphones from ambient vibrations.
- Utility Holders: A tablet holder mounts to most mic stands. It accommodates tablets from 7″ to 10″. A microphone stand cup holder clamps on. You can use it for drinks, cell phones, or keys.
- Specialized Adapters and Extensions: Many options exist for unique setups. These include surface mount female and male mic flanges (5/8-27 Thread). You can also find clip mounting twin microphone mounts. Various coupling adapters (5/8 inch #27 Thread Female, 3/4 inch Long, 5/8 inch #27 Thread Male) help connect different pieces. Extension tubes, like 45° or 90° angle tubes, provide extra reach. Magnetic isolation rings and clip mounting lock-on accessories offer more flexibility. You can even get 3-inch or 6-inch long tubes with male 5/8 inch #27 threads on both ends. These accessories let you customize your stand for any performance or recording situation.
Advanced Considerations for Your Microphone Stand
Performers often look for features that go beyond the basics. These advanced considerations can significantly improve a stand’s performance, durability, and ease of use. They help you achieve a truly professional setup.
Weighted Bases for Enhanced Microphone Stand Stability
A weighted base offers superior stability for any microphone stand. For live performances, experts recommend bases weighing at least 15 pounds (6.8 kg). This weight ensures stability and resists vibrations. Heavy-duty mic stands with these bases reduce unwanted movement. This is especially true when using large-diaphragm condenser microphones or in busy environments. Weighted circular bases effectively provide this crucial stability. This feature becomes even more important when performers use heavy or expensive microphones in live settings. Key advantages include excellent resistance to tipping and vibration. They safely support heavy microphones, offer long-term durability, and improve audio clarity by minimizing handling noise.
Rubber Feet for Vibration Reduction and Grip on Your Microphone Stand
Small details often make a big difference. Rubber feet on a stand are one such detail. They serve two important purposes. First, they provide excellent grip on various surfaces. This prevents the stand from sliding during a performance. Second, rubber feet reduce unwanted vibrations. Vibrations from the stage floor or instruments can travel up the stand and into the microphone. This creates unwanted noise in your audio. Rubber feet absorb these vibrations, ensuring a cleaner sound. They protect your floors from scratches too.
One-Handed Height Adjustment for Your Microphone Stand
Imagine needing to adjust your microphone’s height quickly during a performance. A one-handed height adjustment feature makes this possible. This design allows performers to raise or lower the microphone with just one hand. They do not need to fumble with two hands or interrupt their flow. This feature is incredibly useful for vocalists who switch between singing and speaking. It also helps musicians who play multiple instruments. This quick adjustment saves time and keeps the performance smooth.
Stackable Bases for Efficient Microphone Stand Storage
Performers often manage multiple microphone stands. Storing these stands efficiently becomes a real challenge. Stackable bases offer a smart solution for this common problem. These specially designed bases allow you to neatly pile one stand on top of another. This feature saves valuable space in studios, storage rooms, or even during transport.
Imagine a band with several vocalists and instrument mics. They might need five or six stands for a single gig. Without stackable bases, these stands take up a lot of floor space. They can also become a tangled mess. Stackable bases eliminate this clutter. They keep your gear organized and easily accessible. This design makes setup and teardown much faster. You spend less time searching for the right stand.
Many manufacturers design their round bases with a specific shape. This shape allows them to interlock or sit securely on top of each other. This prevents them from sliding around when stacked. Some stands feature a recessed top or a protruding bottom. These elements create a stable stack. This thoughtful design protects your equipment from damage. It also makes moving multiple stands much easier. You can roll a cart with a stack of stands instead of carrying them individually. This efficiency is a huge benefit for touring musicians and production crews. It helps maintain a professional and organized workspace.
Setting Up for Success: Maximizing Your Microphone Stand’s Potential
Proper setup makes a big difference in any performance or recording. You can get the best sound and ensure safety by correctly using your gear. Maximizing your microphone stand’s potential helps you achieve professional results every time.
Proper Placement for Optimal Sound with Your Microphone Stand
Strategic microphone placement is key to capturing excellent audio. Experiment with angles and distances. This helps manage the proximity effect and captures the best tonal quality. Always adapt to the recording space and the singer’s voice. In a studio, position the microphone about 6 to 12 inches from the singer. This maintains clarity and avoids overemphasizing sibilance or breathing sounds. For live performances, place the microphone closer, around 2 to 6 inches from the singer’s mouth. This reduces background noise and bleed from other instruments.
Consider managing dynamics and tonal qualities. For singers with a strong mid-range, place the mic slightly off-center. For powerful high notes, adjust the mic angle slightly away from direct exposure. This prevents distortion. Utilize close mic placement to increase bass response. It adds warmth to vocals, especially for thinner voices. Always use a pop shield between the singer and microphone. This diffuses sharp air bursts from ‘p’ and ‘b’ sounds. It maintains a clean sound. Employ shock mounts to eliminate unwanted vibrations. These vibrations travel through stands from footsteps or desk movements. This ensures a clearer recording. Minimize sound reflections using sound-absorbing panels or movable panels. Record in a quiet room. Turn off noisy appliances. Close windows and doors to block external sounds. For hard floors, have the singer stand on a rug or blanket. This reduces foot noise and echo.
Balancing Your Boom Microphone Stand for Safety
Safety is paramount, especially with boom stands. Always ensure the total weight of the microphone, shock mount, and cable stays within the stand’s rated capacity. Ideally, keep it under 80% of the maximum load. Never exceed the stated weight limit of the boom stand. If the boom arm sags, first tighten the counterbalance knob or clutch mechanism. Be aware that longer boom arms increase leverage. This creates potential instability, especially with heavy microphones. Choose a 30-36 inch arm unless you specifically require extended reach.
Maintenance Tips for Extending Your Microphone Stand’s Life
Regular maintenance keeps your equipment in top condition. After each use, wipe down the stand with a clean, dry cloth. This removes dust and grime. Check all screws, knobs, and locking mechanisms. Tighten any loose parts. Lubricate moving joints periodically with a silicone-based spray. This ensures smooth adjustments. Store your stand in a carrying bag or case. This protects it from scratches and impacts during transport. Inspect the rubber feet for wear and tear. Replace them if they become damaged. Proper care ensures your stand remains reliable for many years.
Accessorizing Your Microphone Stand for Enhanced Functionality
Your microphone stand is a great starting point. However, adding the right accessories can truly unlock its full potential. These additions make your setup more versatile and improve your sound quality. They help you perform at your best.
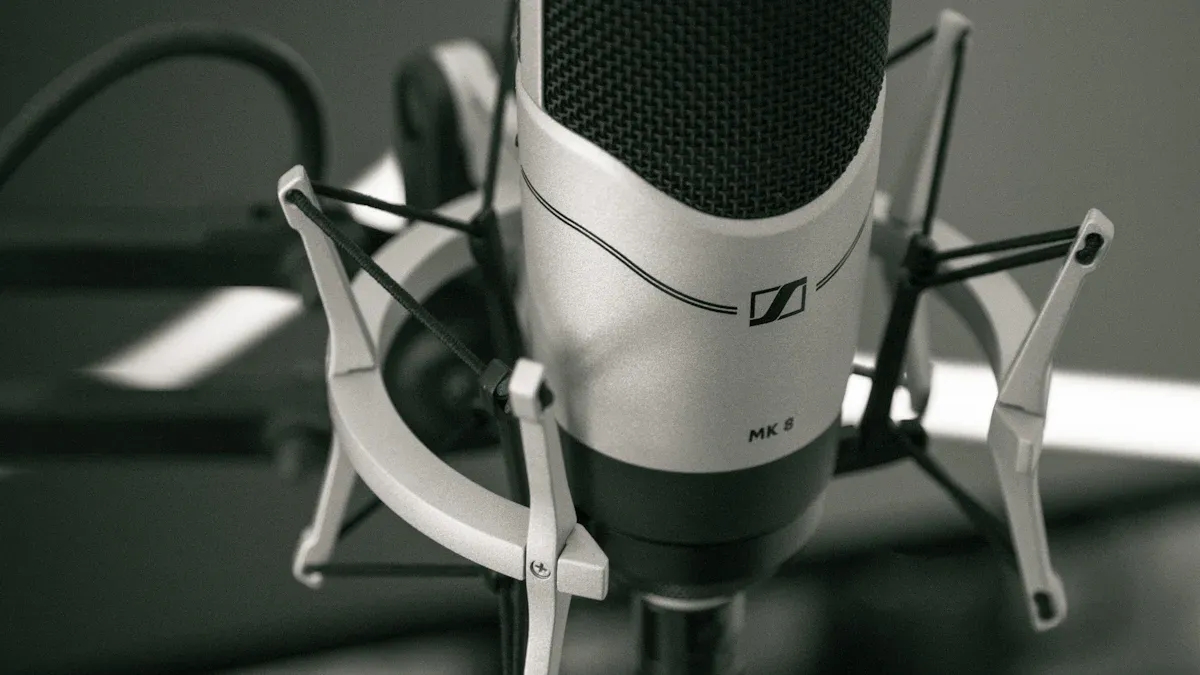
First, consider shock mounts. These clever accessories use elastic components to isolate your microphone from the stand. They stop physical vibrations from reaching your mic. This means you avoid unwanted noises like desk bumps, footfalls, or keyboard sounds. Shock mounts are especially helpful for sensitive condenser microphones. They give you a much cleaner recording.
Next, think about boom arms. These arms extend your microphone horizontally. They offer flexible positioning over or around your desk. Boom arms free up valuable desk space. They also help you achieve optimal microphone angles. Dual-joint versions give you even more adjustability. They offer 360° swivel and multi-axis movement. This is super useful in tight spaces.
Pop filters are another essential accessory. You place them between yourself and the microphone. They diffuse sudden air bursts from your mouth. This prevents distortion caused by "p" and "b" sounds. Pop filters significantly improve vocal clarity. Metal mesh filters offer better durability and are easier to clean than nylon ones.
For situations with limited floor space, desk stands and weighted bases offer great convenience. They are compact and easy to reposition. They provide a stable base without taking up much room.
Finally, cable management clips keep your setup tidy. You use these clips to organize XLR or USB cables along boom arms or stands. They prevent cable tangling. They also reduce strain on your connectors. This creates a neater and more functional workspace. These accessories help you focus on your performance, not your gear.
Common Mistakes to Avoid with Your Microphone Stand
Performers often focus on their microphones and instruments. However, they sometimes overlook common mistakes with their microphone stand. Avoiding these errors ensures a smoother performance and protects valuable equipment.
Overloading Your Microphone Stand
Every microphone stand has a weight limit. Exceeding this limit can cause serious problems. A stand might tip over, damaging the microphone or injuring someone. Always check the manufacturer’s specifications for maximum load capacity. Heavy microphones, shock mounts, and accessories add significant weight. Distribute weight evenly, especially on boom stands, to maintain balance.
Prioritizing Portability Over Microphone Stand Stability
Many performers value lightweight gear for easy transport. However, prioritizing portability too much can compromise stability. A lighter stand might lack the necessary stability compared to heavier models. This increases the risk of the microphone tumbling over. It can injure someone or cause interruptions during a performance. Performers might worry about equipment instead of their art. Heavy-duty stands offer superior stability and a secure base. They reduce the risk of the microphone slipping or falling during crucial moments. They also often include specialized features like shock mounts. These features prevent unwanted vibrations and handling noise, especially in high-energy live concert settings.
Improper Cable Routing on Your Microphone Stand
Messy cables create tripping hazards and look unprofessional. They can also damage cables and connectors. Wireless microphones eliminate cable problems entirely. They transmit sound signals wirelessly to a receiver. This removes tripping hazards and cable clutter. It gives performers complete freedom of movement and simplifies setup. If using wired microphones, proper cable routing is essential. Use the shortest cables possible to avoid tangled loops. Provide enough slack for position adjustments. Group cables neatly with reusable Velcro ties or theatrical cord. Never wrap cables tightly around support beams. Use re-closable J hooks or Velcro straps to support suspended cables. Coil extra cable lengths and secure them. Use cable guards where cables cross foot-traffic areas. This alerts people to the trip hazard.
Neglecting Regular Checks and Maintenance of Your Microphone Stand
Many performers focus on their microphones and instruments. However, they sometimes overlook common mistakes with their microphone stand. Avoiding these errors ensures a smoother performance and protects valuable equipment.
Ignoring regular checks and maintenance for your microphone stand is a common mistake. This oversight can lead to unexpected problems during a performance. A well-maintained stand provides reliable support. A neglected one can fail at the worst possible moment.
You should always pay attention to signs that your stand needs care. For example, the boom arm might start drifting downward during use. This means it cannot hold its position. The stand might also become hard to adjust. It may not hold its position after you adjust it. You might push down on the pole, and it slides. These are clear indicators of wear.
Other issues also signal a need for maintenance. The mic clip might not feel secure when you pivot it. It could pivot horizontally when someone touches it or moves the cable. The entire stand might wobble. It might not feel tight to its base. If the boom arm cannot support the microphone in the desired position, even with moderate tightening, it needs attention. Mic clips on the boom arm might not hold the mic firmly. This causes the mic to spin or droop. Over time, bushings, rubber, and plastic washers can fail from wear.
Regular inspection and care prevent these issues. They extend the life of your equipment. They also ensure your microphone stand performs reliably every time.
Integrating Your Microphone Stand with Other Gear
Performers often use many pieces of equipment. Connecting a microphone stand with other gear makes a setup more efficient. This integration helps artists focus on their performance.
Combining Your Microphone Stand with Pedalboards
Guitarists and bassists often use pedalboards for their effects. Integrating a microphone stand with these boards can simplify their stage setup. Products like D’Addario’s Pedalboard Mic Stand clamp directly onto a pedalboard. This accessory takes up the space of a standard pedal. It lets musicians place their microphone anywhere on double-row pedalboards. This includes models like the XPND2. The stand is telescoping, portable, and lightweight. It ensures stable microphone placement without adding bulk. This keeps the setup clean and easy to manage.
Quick-Release Connectors for Your Microphone Stand
Quick-release connectors are a great addition for busy performers. They make setting up and taking down equipment much faster.
- These connectors significantly reduce the time for both setup and teardown.
- They improve workflow, especially where equipment is shared.
- These connectors help change equipment quickly. This boosts overall efficiency.
Performers can swap microphones or stands in seconds. This is very useful in fast-paced environments.
Notable Microphone Stand Models in the Market
Many excellent microphone stand models exist. They offer great durability and stability. A sturdy microphone stand is a robust and reliable support structure. It holds microphones during performances, recording sessions, or public speaking. These stands use durable materials. They often have adjustable height and boom arm options. This helps with different microphone positioning needs. They provide stability and support. This ensures secure placement of microphones during use. Performers can find models known for their heavy bases or strong construction. These stands give peace of mind during any event.
Investing in the right microphone stand is paramount for any performer. By understanding types, features, and setup techniques, you ensure stable support. A reliable microphone stand empowers you to fully unleash your stage presence and deliver your best performance.
To ensure a microphone stand’s reliability and longevity, consider these factors:
- High-Quality Construction Materials: Heavy-duty steel and other quality building materials offer durability and stability.
- Professional Level Construction: Reinforced joints and high-quality clamps ensure consistent performance.
- Reputable Brands: Well-known brands often guarantee better quality and warranties.
- User-Friendly Design: Easy installation and well-designed joints enhance the user experience.
- Reducing Noise Disturbances: Superior quality prevents unwanted noise, providing clearer audio.
- Durability: Products that last longer reduce the need for frequent replacements.
- Ensuring Stability and Reliability: Robust materials prevent tipping, even with heavier microphones.
- Positioning and Flexibility: High-quality stands offer precise positioning for optimal sound capture.
FAQ
What makes a microphone stand stable?
A stable microphone stand has a heavy base or wide-spreading legs. Weighted bases, often found on round base stands, keep them firmly planted. Tripod stands achieve stability with widely spread legs. Rubber feet also prevent sliding and absorb vibrations.
Which type of microphone stand is best for a singer who moves a lot?
A tripod microphone stand with a boom arm offers great flexibility. Its foldable legs make it portable. The boom arm allows the singer to move around while keeping the microphone in place. This setup provides both stability and freedom of movement.
Why should I use a pop filter with my microphone stand?
Using a pop filter significantly improves vocal clarity. It diffuses sudden bursts of air from "p" and "b" sounds. These sounds can cause distortion in your audio. A pop filter ensures a cleaner, more professional sound for your recordings or live performances.
How can I make my microphone stand last longer?
Regular maintenance extends your microphone stand’s life. Wipe it down after each use to remove dust. Check and tighten all screws and knobs. Lubricate moving parts periodically. Store the stand properly in a bag or case to protect it from damage.


